The Building Blocks of Creativerly: Essential Apps and Services I use to build a publication

This is a deep dive into the apps, tools, and services that power Creativerly, my workflows, and that help me building and maintaining this publication.

You are reading Creativerly, the weekly digest about creativity and productivity-boosting tools and resources, combined with useful insights, articles, and findings from the fields of design and tech. The newsletter built for the creative community.
Apps, tools, and services are not everything, but at the same time, they are everything. They are an integral part of my life. There are a couple of apps and services I use daily to write, curate, build, grow, and maintain Creativerly and keep it a sustainable business. Back in January 2021, I shared a look behind the scenes of Creativerly. It gave readers some insights into how I build Creativerly. Since then most of my workflows have changed and gotten optimized. Recently I decided it was time to write an update on the tools I use to run Creativerly, write the weekly newsletter, and create the publication about creativity- and productivity-boosting resources.
Occasionally, I review my productivity tools. Most of the tools I use daily do stick, but sometimes I realise that I am missing some features and functionalities and therefore, I decided to go on the hunt for new and exciting tools. If you have the feeling that an app you are currently using is the perfect fit for you, there is no need to search for a new one, but it comes down to personal preference if you still would like to try out something different. It is not reprehensible if you like to try out and explore new apps and tools as long as your work, your projects, your tasks, your notes, your knowledge base, etc suffer from it.
This post is more than a list of the tools I use for writing, building, growing, and maintaining Creativerly. It dives into how I use these specific tools and workflows to reach my goals. Besides that, I will include some additional recommendations regarding alternative tools to the ones I am using. I will keep the old blog post about my productivity tool stack still alive, since then you can compare both of them and get an idea of what has changed over the last two years.
Tana
Tana came out of stealth in 2022, surged in popularity, and promoted itself as the "Everything OS". Tana got founded in 2020 and according to Crunchbase, it raised a Seed Round by The Fund and Firestreak Ventures.
Once Tana came out of stealth, it was all over my timelines. There are different reasons for that. First of all, it seems like Tana partnered up with the biggest creators within the space of knowledge management and TfT. People with large follower bases started to create and share content about Tana. At that time, Tana was (and it still is as of writing this) only accessible if you had received an invite. The waitlist-only approach does have some advantages, but at the same time, it is a controversial one. First, it can help generate buzz and excitement around a new product or service. By limiting access to the product, the company can create a sense of exclusivity and scarcity that can make people more interested in trying it out. That is exactly what happened with Tana. But on the other hand, the waitlist approach can be frustrating for users who are eager to try out a new product but are unable to do so because of the waitlist. This can lead to negative reviews and feedback, which can hurt the company's reputation.
While the waitlist approach has some advantages and disadvantages, I am not a fan of how Tana handled it initially. If a company wants to create buzz for a new app, limiting access is understandable. Ramping up marketing and collaborating with content creators while still restricting access, however, has a bad aftertaste. I get the fact that an ever-growing waitlist might be a great argument when you are planning to raise additional funds for the company, but while Tana became incredibly popular, I also stumbled across comments that were put off by its approach.
Nevertheless, Tana is indeed a great app. I have been attracted to note-taking tools that use the outliner approach in the past therefore, Tana already received some of my interest upfront. When I did my daily notes in Craft or Obsidian, I always created bullet points, although both tools do not natively support the outliner approach (you can create a better experience though in Obsidian by using plugins). So, besides the general buzz around Tana, it already had some personal attraction points to me. My preferred note-taking or PKM tool is always my task management and project management too. I like to keep my notes and my knowledge base connected with my journaling, my projects, and my tasks. This was another reason why I got excited about Tana. The feature that polarized Tana probably the most is the so-called “Supertag”. A supertag gives the nodes you create within Tana superpowers. I use Tana for daily notes, task management, and project management. To showcase how I use supertags, I am going to showcase my writing dashboard within Tana.

In Tana, I have created a supertag called “#writing”. In the first place, supertags work like regular tags. For example, you write down some notes about a book and tag the book with “#book”, or you found an article, added it to your knowledge base and tagged it with “#article”, simple as that. In most tools, those tags are simply tags, a piece of text that has been marked with another piece of text to give it some more context. Tana gives you the turn raw notes into tasks, bugs, follow-ups and more, thanks to supertags. As soon as you create a supertag, Tana lets you add fields to the supertag which then can be used over and over again while you are using that specific supertag. Let us get back to my #writing supertag.
Whenever I am jotting down my daily notes and I have a quick idea for an upcoming blog post, I write down the title of the post and tag it with #writing. At this point, I know that if I am searching for that tag, I will find my blog post idea again in the future. Tana gives me the possibility to add more context to that blog post idea, thanks to the supertag I have created. I created a couple of fields that let me set up my writing dashboard in Tana. Since I do not only keep track of my writing for Creativerly but also for my personal blog and ProductivePrivacy, the first field I added to my #writing supertag is called “Project”.
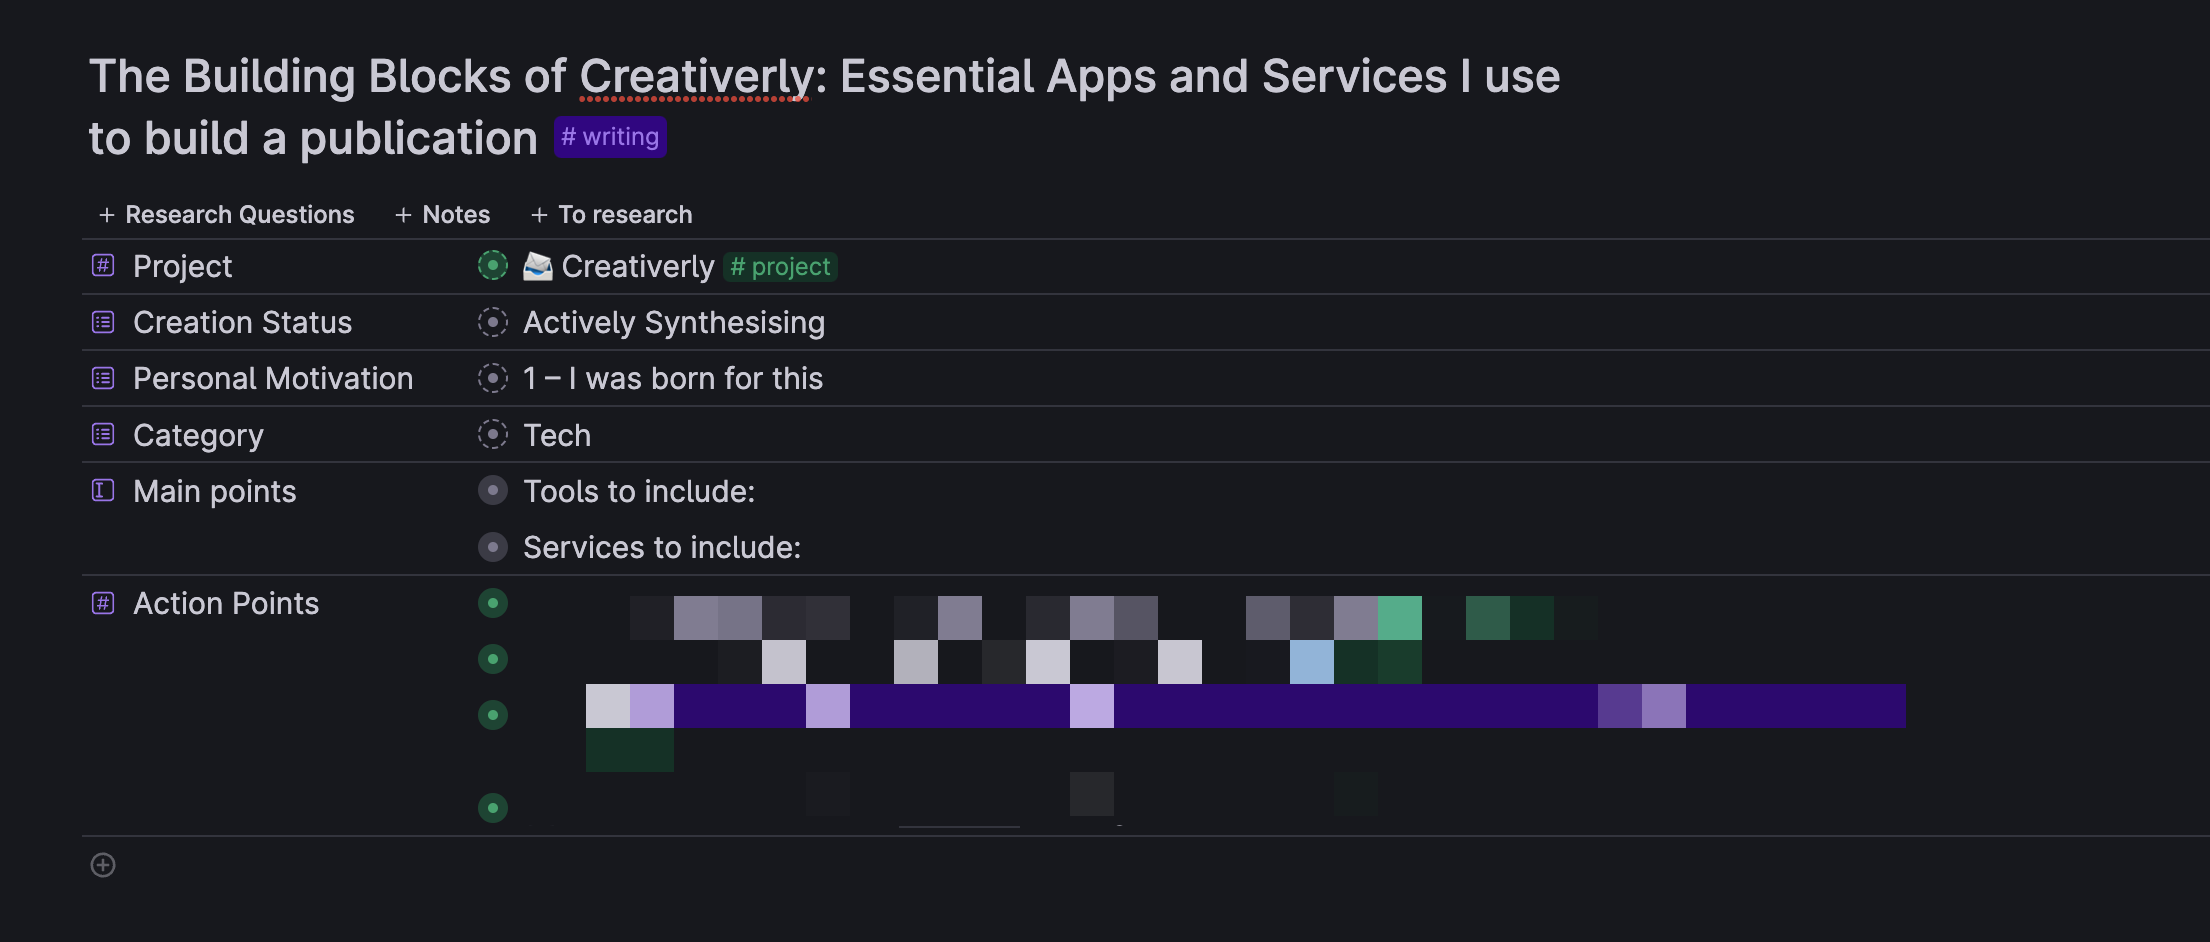
So, whenever I have a specific blog post idea, I write it down, tag it with #writing, and then I expand the node, which gives me access to the fields I have added to the supertag. As already mentioned the first one is “Project”. In this example, I created a blog post idea for Creativerly, so I set the project to “Creativerly”. Fields in Tana can have different functionalities. The project field I use is an instance field, which means everything within that field is or should be tagged with another supertag, #project. You will learn why this is helpful and powerful at the same time in a bit. The next field is called “Creation Status”. Together with the field “Personal Motivation”, I shamelessly copied that setup from Maggie Appleton after watching her Tana tour video. Both fields are so-called “Options” fields, which means you can set up pre-defined options that you can then reuse and select from within that field.
The Creation Status field has the following options: Idea Stash (the first stage in which I put all my ideas), Ambiently researching (which means I am not actively writing and producing content, but I am aware of the topic and add notes and questions to it over time), Actively Synthesizing (which is the stage in which I am actively working on the piece), and Alive and Public (which is pretty much self-explanatory, content that has been published receives that status). The Personal Motivation field gives me the possibility to assign the idea a priority up-front. The options include: 1 - I was born for this, 2 - A good idea, 3 - Meh. I am using this field as a prompt. If I have the feeling I was born to write about a dedicated idea, I know I am going to focus on it over the upcoming days or weeks. By assigning “3” as a priority, I know that I would like to keep track of the idea, but I will not get back to it anytime soon.
As you can see, those fields that I have added to the supertag allow me to give quite a lot of context to an idea. In any other note-taking or PKM tool you could probably do the same by just adding that kind of information to the page, note, or document itself, but still, you wouldn't get the chance to experience the joy of live queries. For me, live queries are what make Tana magical. All my writing ideas can be scattered across the whole app since as long as I tag them with #writing it does not matter where I wrote them down. But if I want to resurface them in a dedicated place within Tana, live queries are the solution.
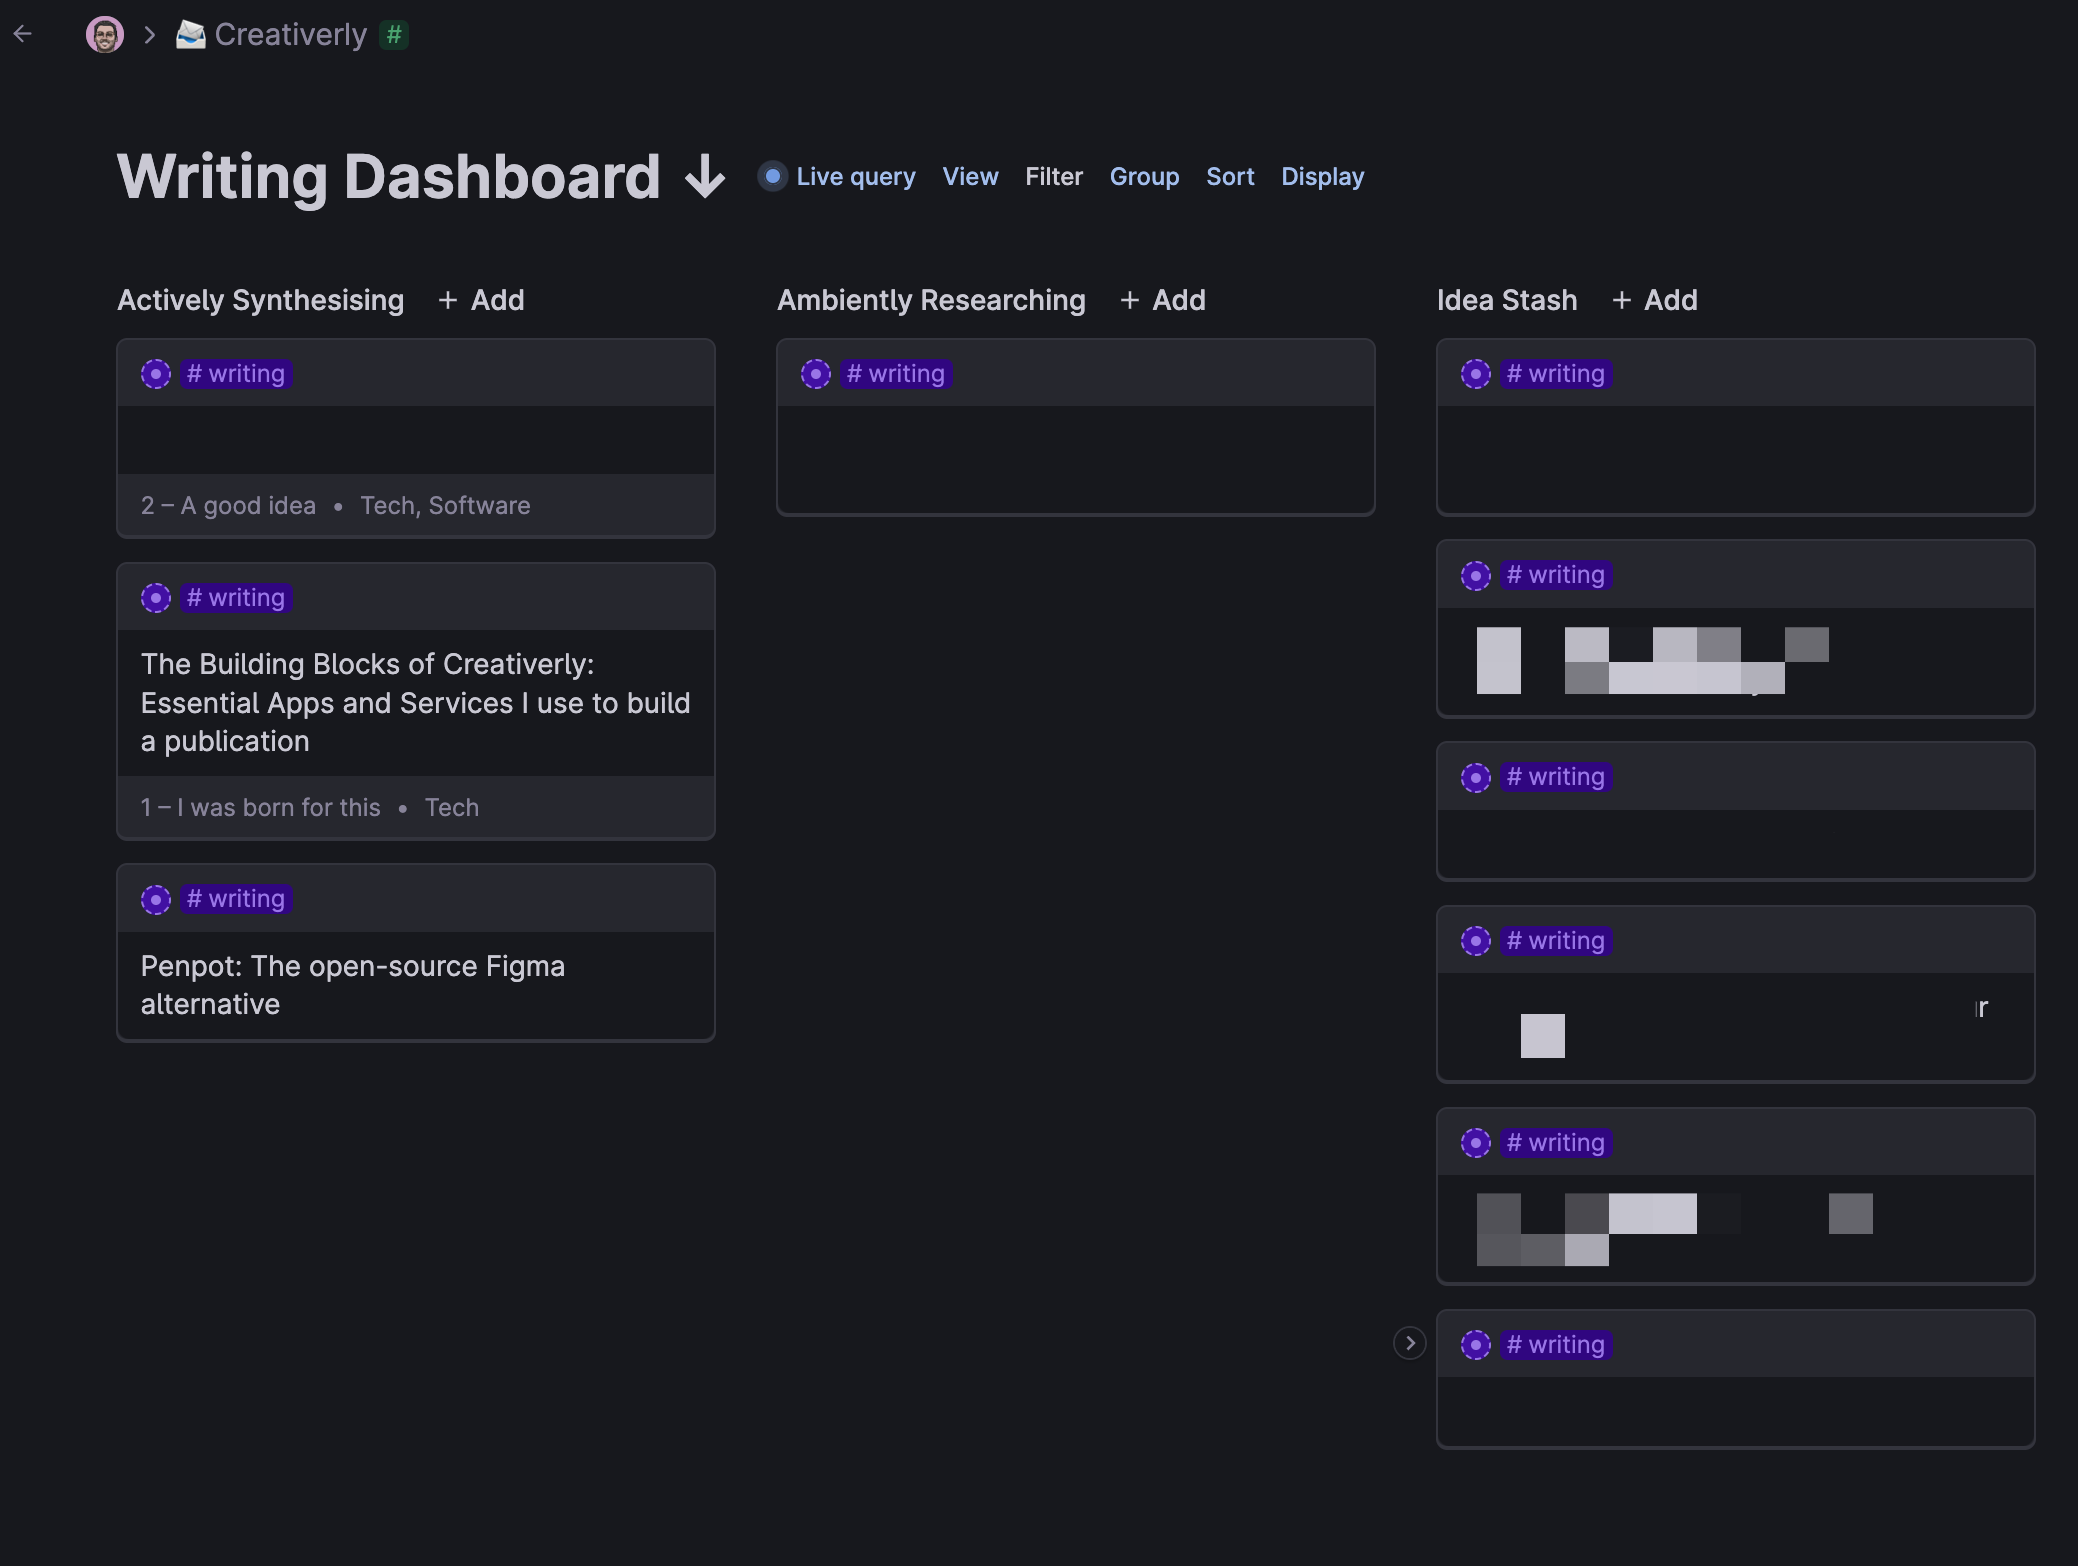
And here we are, this is how I created my writing dashboard in Tana. By hitting CMD + K users can open up the command menu. From there, you type “Find nodes” and Tana will autosuggest related commands. After clicking on “Find Nodes” from the menu or pressing enter, I selected “…with tag #”, “…#writing”, and since I wanted to create a writing dashboard only for Creativerly I continued with “…. With field:”, “… Project”, “…=Creativerly”, “... as list”. Done. The Writing dashboard got created. Now, Tana pulls in all my writing ideas that I have tagged with #writing and for which the project field has been assigned to Creativerly. Now you can see why it is super handy to have those fields to give your notes some more context, like the project field I use for the #writing supertag. Since I keep track of my writing for Creativerly, my personal blog, and for ProductivePrivacy, fields give me the possibility to create a live query that only resurfaces the notes I would like to be resurfaced.
This allows me to keep track of all my writing within Tana. I use fields to gather some first and early notes and thoughts, links, inspiration, and research questions, but also tasks that are related to an idea I would like to write about. The combination of supertags, fields, and live queries allows me to build customized systems within Tana to write daily notes, establish habits, manage my projects, keep track of my tasks, and a lot of other stuff. I even keep track of the coffee beans I buy and taste by using a live query in Tana. It is an incredibly versatile app and it replaced quite a lot of tools I have used previously. For daily notes and project management, I used Craft in the past, my preferred task management software was Todoist, and to create databases I used Airtable. But now, I use Tana for all of those (and even more) use cases.
Scrintal
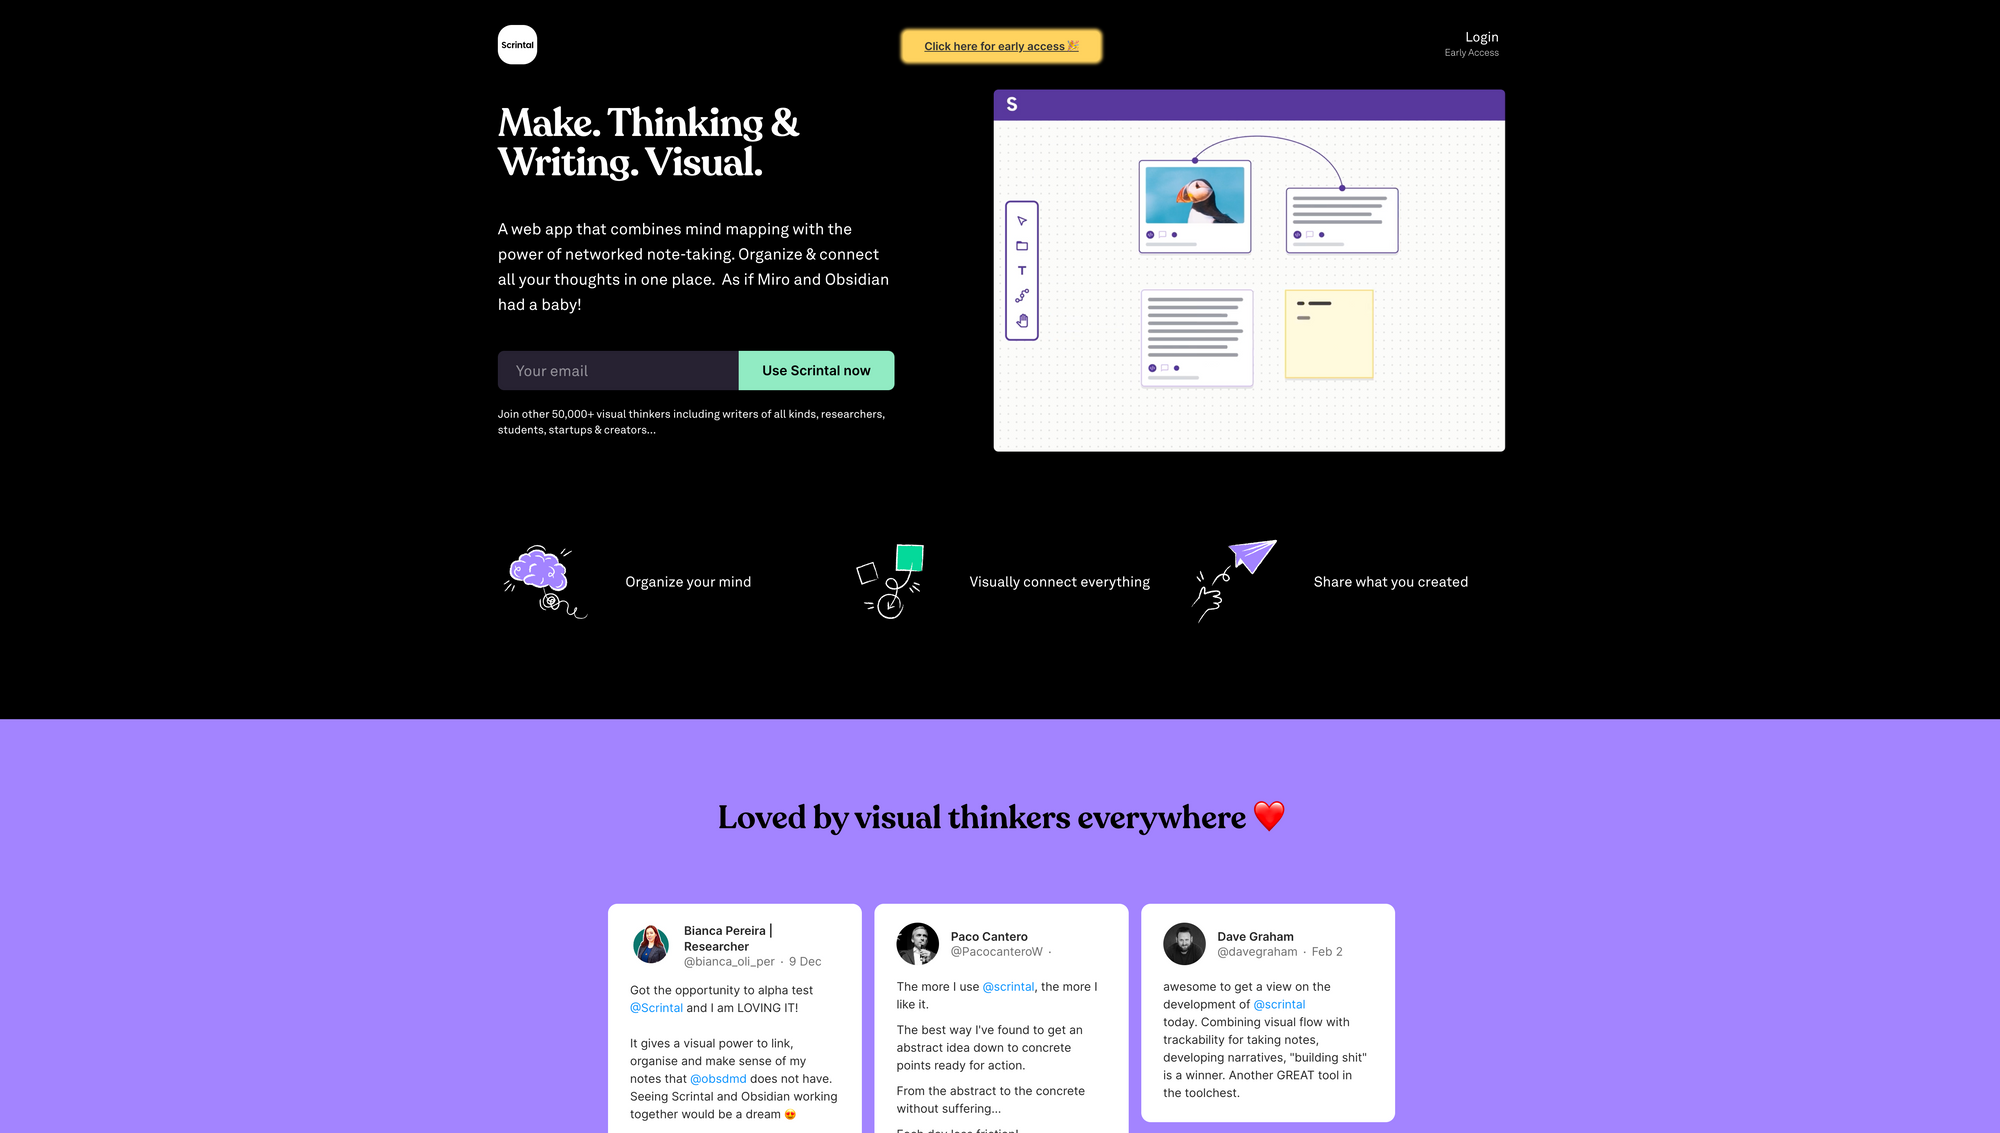
The story of how I became a Scrintal user started back in January 2022. While browsing Twitter, I stumbled across Scrintal, a tool that combines visual note-taking, mind-mapping, and knowledge management. The idea sounded interesting to me, and I wanted to try it out. Scrintal was in closed beta back then, so I signed up for the waiting list and expressed my interest in the tool over on Twitter. Suddenly, I got in contact with one of the founders, we had a call and talked about my current note-taking and writing workflows, I got a demo of an early version of Scrintal, and after that, I got the chance to try out Scrintal on my own. In the following newsletter issue, I shared some of my early thoughts, but the way Scrintal was handling visual notes combined with mind mapping triggered something for me. Over the following months, I used Scrintal more and more, especially whenever I wanted to explore an early idea for a new article, I used Scrintal to lay out the specific parts of my upcoming article. Besides that, I shared my feedback and my suggestions with the founders, stayed active within the Scrintal Slack community, and followed the development of the app.
After a couple of months, Scrintal became a crucial part of my writing process. The only thing that still kept me from fully committing to it was the fact that Scrintal lacked in terms of UI design and UX. Since I am a Product Designer, it is always a magical feeling to use beautifully designed software, that has been crafted with care, love, and a clear focus on delivering an outstanding User Experience. I knew that Scrintal was still in an early stage, but throughout a couple of months, there has not been a single visual update. I became more active in the community and shared my input regarding the design of Scrintal.
Within the check-in calls I had with the founders, I also shared feedback and suggestions on how to improve some UI elements without a lot of effort. I still was incredibly excited about Scrintal, and I was dreaming about what the app could become if it would receive some love from a designer. Fast-forward to today, and I am the designer pouring some love and craft into the user interface of Scrintal. After loads of inputs and suggestions from my side, and a couple of meetings with the founders, I joined the Scrintal team full-time back in December 2022. As a designer, a dream came true with this role. I got the chance to focus and work on, evolve, and shape an app that I used every single day, that solved a problem for me, and that became a crucial part of my workflow.
One of my favourite workflows within Scrintal is brainstorming, ideating, and exploring an idea or topic I would like to write about. As an example, let us take a look at the blog post you are currently reading, a deep dive into the apps, tools, and services I use to build and run Creativerly. The idea got born while I was jotting down some daily notes within Tana. As you know by now, I kept track of the idea by adding it to my writing dashboard with the #writing supertag. I then decided that this should get the highest priority, which means I started working on it once I came up with the idea. The next step of my writing process includes moving my idea to Scrintal.
In Scrintal, I have an infinite canvas that gives me the freedom to explore a variety of aspects and directions of my idea. Notes in Scrintal are represented with cards that can be placed anywhere and moved freely on the canvas. The first thing I do in Scrintal when exploring an idea for a blog post creates a card, and give it a title (this sometimes is already the title of the blog post or just a working title for the process of brainstorming and exploring). Within that card, I start writing down what I would like to write about in the blog post. I think of those notes as sections or headlines in the finished post. Therefore, I write down “Intro”, “Apps & Tools”, followed by “Tana”, “Scrintal”, “iA Writer”, and so on. As you can see within the attached video, I always press “+” before entering a new section. This creates a link in Scrintal. You can either link to other existing cards or create a new card using this method.
The reason I create links for the different sections of my blog post is the fact that on one hand, this allows me to create a mind map of my blog post content, but on the other hand, at any stage of my brainstorming and exploring process I can dive into a specific section and start jotting down some early thoughts in the form of bullet points. Within the Tana note-card, I wrote down „Writing dashboard“, „Supertags“, „General Overview“, „Waitinglist“, etc. since those bullet points were the first that came to my mind when I was thinking about what I would like to write about Tana within my blog post.
At this stage, my writing process becomes a little bit more Freeform. By that, I mean that sometimes I move quickly from brainstorming, thinking, and researching, onto the actual writing phase all within Scrintal. Sometimes, I just explore the topic in Scrintal and for the actual writing, I then switch to iA Writer, which is without a doubt my favourite writing environment.
iA Writer
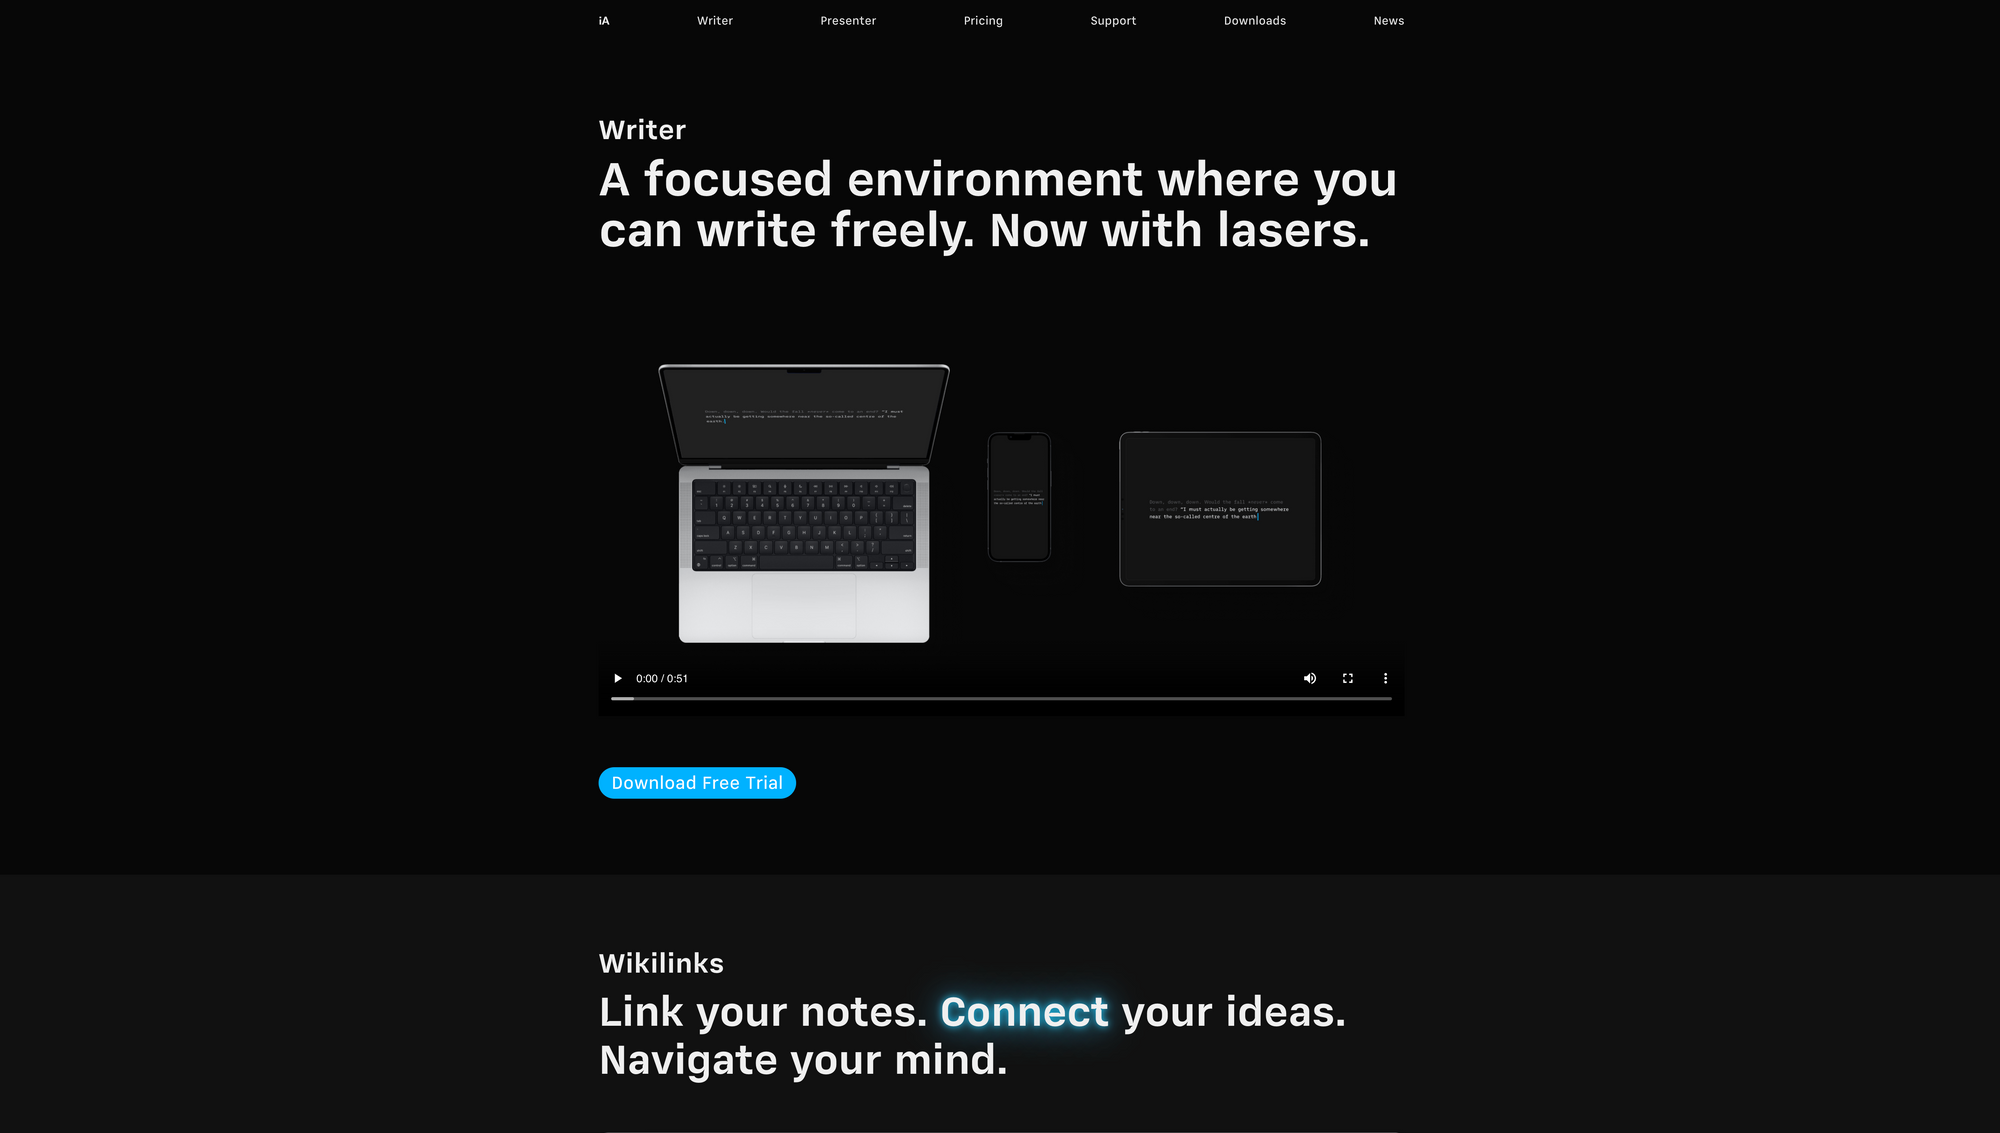
iA Writer is one of the few apps that is part of my toolbox for multiple years. I tried out loads of writing apps, but I always come back to iA Writer because of its lovely designed interface, the distraction-free writing environment, and the subtle features that power and fuel my writing workflows.
To sync my writing to all my devices I use a cloud which houses my blog posts as Markdown files. Since iA Writer is markdown-based, I can simply open up my blog posts across my devices and start or continue writing no matter where I am or which device I am currently using. One of my favourite features is without a doubt the focus mode. After activating focus mode in iA Writer, only the active sentence or paragraph gets highlighted. It is a lovely feature that keeps you only focused on what you are currently writing. Everything else gets dimmed so it does not distract you. Focus mode as my favourite feature is closely followed by Syntax Highlighting and Style Check. Syntax Highlighting helps you point out the weak verbs, unwanted repetitions, and possible clutter within your writing. With the Style Check feature, iA Writer helps you to get rid of fillers, clichés, and redundancies.
As you know by now, my core writing dashboard sits within Tana. Whenever I decide to start researching and writing a new piece, I take some quick notes within Tana, visually brainstorm and explore my ideas in Scrintal, and then either finish the piece in Scrintal or move it to iA Writer, where I have my preferred distraction-free writing environment. This means, I kind of have another writing dashboard within iA Writer. This helps me to keep my writing structured and organised no matter which app I am currently using. Some might think that this kind of workflow holds loads of danger zones which could drag me out of my actual writing flow since I am moving back and forth from different apps. Other people, especially writers and content creators like to have a closed system in which everything comes together.
Probably the most popular tool to do so is Readwise. Readwise offers a wide variety of integrations to pull in your Kindle Highlights, Articles Highlights, and more into Notion, Obsidian, Logseq and others. Whenever I am reading an article, I am simultaneously taking notes and adding highlights to a node dedicated to the article within Tana. When I am reading a book, I am doing the same. This means I am basically doing what Readwise does but I do it manually. And that is fine for me since the current tool stack regarding my writing workflow simply works for me. If you like to integrate each of your tools, that is fine too.
I have the feeling that people keep questioning their systems and workflows because they see systems and workflows from other people. Also, there are quite a lot of writers and content creators who are teaching courses and spreading the misinformation that there are only a couple or even one system that works, if you want to be creative and productive during your writing sessions, generate ideas, and make sense of what you are reading. And that is simply wrong. If you like to use five, six, or ten different tools that fuel your note-taking and writing process, but you manage to keep writing and producing content, do me a favour and stick with it instead of questioning it because someone told you there is only one right system. In case you are struggling to find the system and the apps that work for you, I can highly recommend reading Calmer Notes by Elizabeth Butler (this is an affiliate link that gives you a 15% discount on the book), an outstanding book that delivers all the insights you need to find out what system works for you.
Besides iA Writer being my preferred writing environment, I also like to use 1Writer on my iPhone and iPad, another beautiful, minimal, and lightweight markdown editor that gives me the possibility to access my markdown files from the cloud, Markedit on macOS, which again is another simple markdown editor that simply a joy to use, and recently, I started to use Lex, an AI-powered writing app. I am not worried about AI-powered writing apps doing the whole job, since I experienced already a couple of examples that clearly showed that articles written by AI miss the personal tone and perspective only a real human can provide for a certain kind of topic.
Nevertheless, I do believe that AI-powered writing apps will change the way we write and they will help us to overcome writer‘s block by providing possible ideas, inputs, and action points on how to continue or finish an article. On top of that, Lex helps me to improve my writing and learn how to improve it. I use Lex mostly for editing purposes. That means, whenever I feel I am done with another paragraph or a whole piece but at the same time feel that certain sentences could be improved, I use Lex's rewrite feature. It works like a charm. All you have to do is mark a sentence or a paragraph and click on „rewrite“. After that, AI will analyze what you have written and rewrite it. Sometimes, the output sounds quite good, but sometimes it uses words that I would never use to express my thoughts. Therefore, I always use the rewrite feature as an inspiration to transform and edit my writing but I do not use it as a straight replacement.
Lex and other AI-powered writing apps (there are a bunch of them, like Frase*, Rytr*, Writesonic*, Copy.ai*, Moonbeam*, Sudowrite*, and loads more) could shine if they are building towards an experience Hemingway App is offering, but with the power of AI. Hemingway highlights if you use too many adverbs, if your text has repetitions, or if your sentences are too long. Combine this with the power of AI and your writing app not only highlights your errors and rewrites your text but helps you to learn and improve your writing while you are writing.
Refind
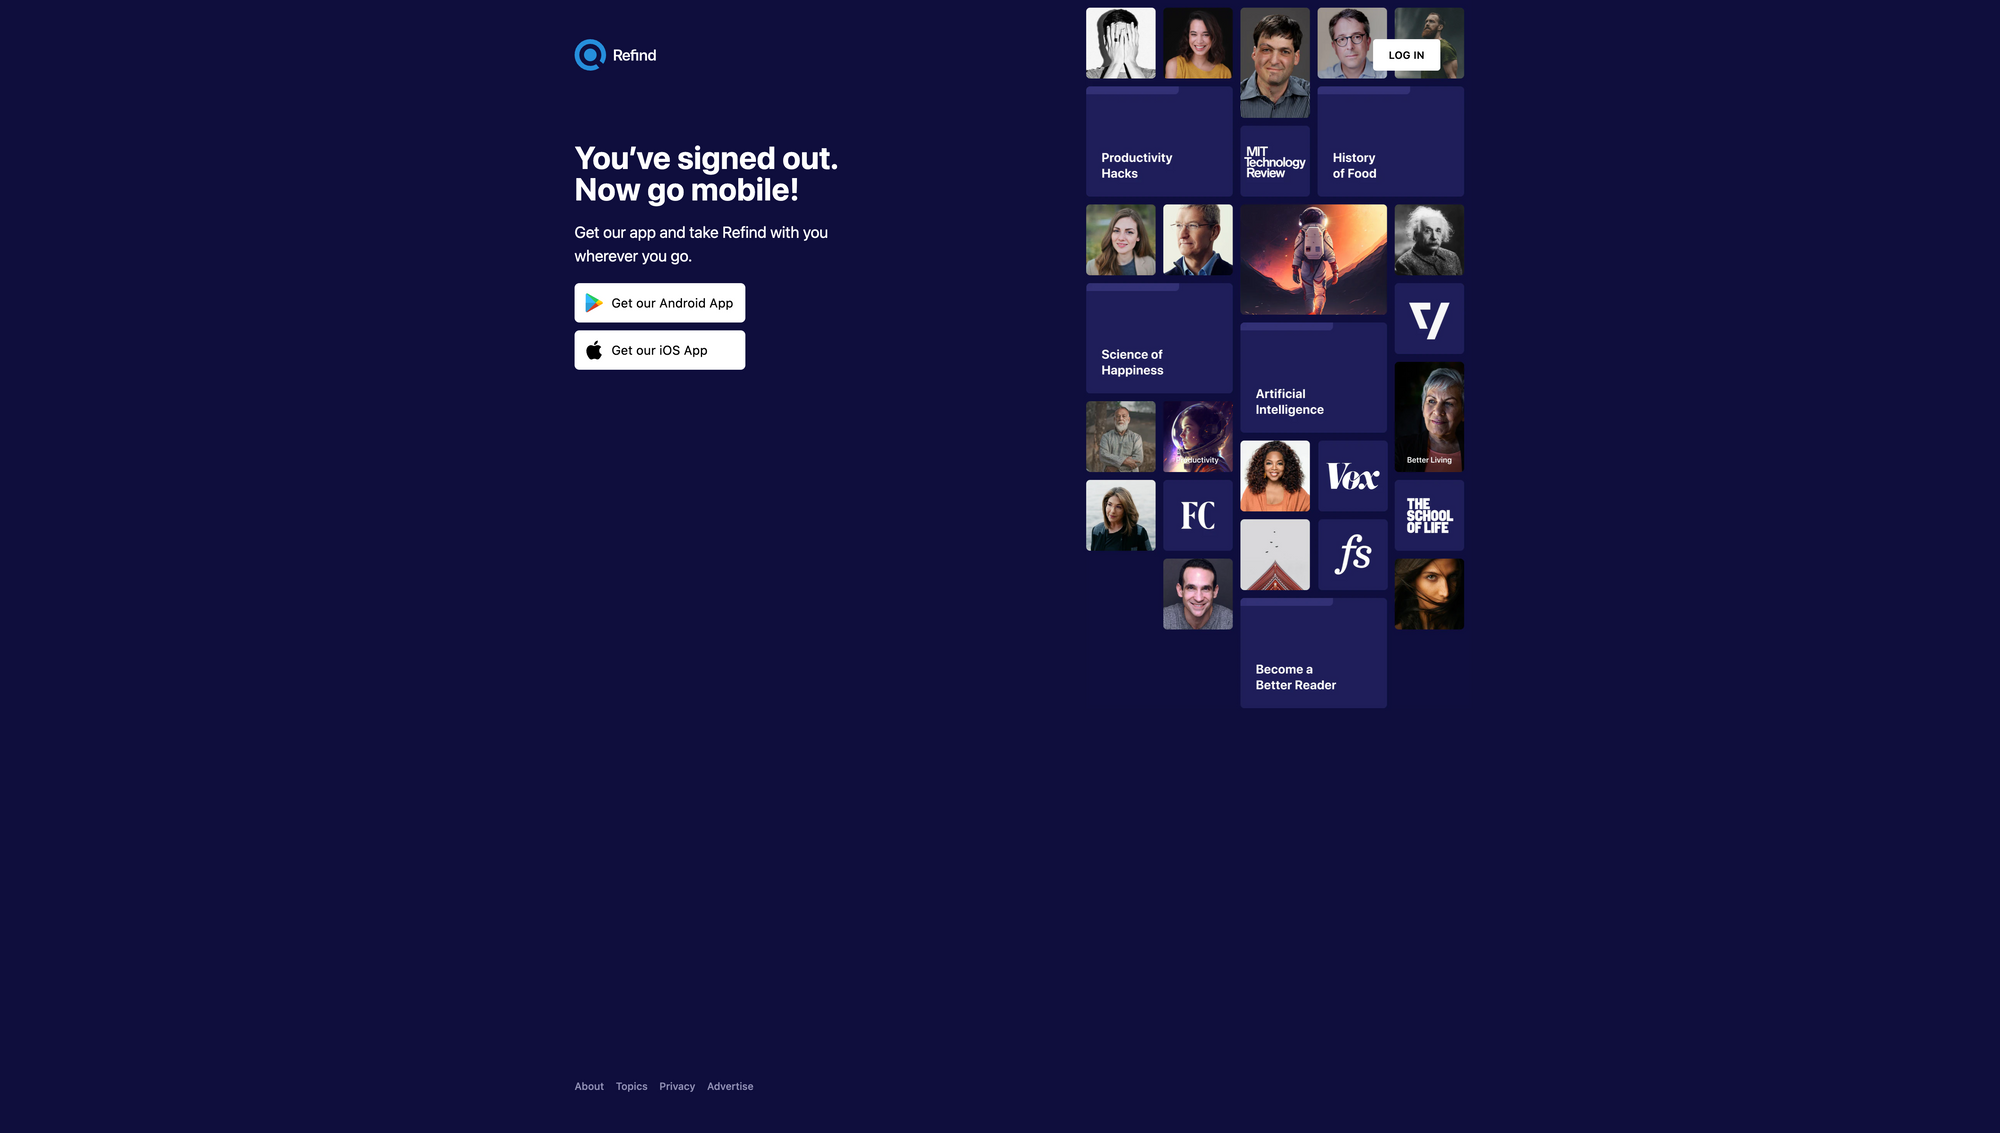
Building and maintaining Creativerly does not only mean writing it every single week, it also involves curating content, especially articles. The internet gets flooded with new content every single day. This makes it hard to keep up with articles and blog posts. Therefore, I am using an assistant that helps surface the most insightful and interesting articles based on my interests, preferences, and the articles I have already read. That assistant is called Refind*, a superb service that learns from interests and reading behaviours and suggestions based on those new articles. Every single day, Refind picks five articles (or even more) tailored to my interests. It quickly became one of my all-time favourite and most helpful tools.
To curate articles, I need to read a lot. But, I do that anyways throughout my week. To filter through the vast amount of content, articles, and blog posts that get published every single day, I am subscribed to a bunch of newsletters, follow online magazines and blogs via RSS, and check Refind every single day. I love Refind since it not only does a great job surfacing amazing content (that is indeed tailored to my interests) but also features a beautiful and distraction-free reader view, in which you can change the font of the post, listen to it, and highlight certain parts of the post of which you would like to keep track of. In addition to that, you can create collections to save and organise your favourite articles that you discovered through Refind. To further structure and organise your reading within Refind, it allows you to add notes or tags to articles. Those features are hidden within Refind, and I am not sure if it was intentionally designed like that. To access features like “Save to”, “Reader view”, “Add Note”, “Add Tag” or “View Similar”, you have to open the context menu of an article by clicking on the three-dot icon in the top right corner of an article within the “Today” view.
With Refind’s apps that are available for iOS, iPadOS, Android, macOS, and the web, you can always skim through awesome new articles no matter where you are and which device you are using. This is an incredibly important aspect. Reading and discovering new, insightful, and interesting articles should be accessible. Since Refind is available everywhere, you can always access your reading list, your collections, and your article notes, but also discover new and insightful posts. To give "reading" and "discovering" in Refind a social component, Refind introduced a feature called “Reading Buddies”. This feature will allow you to add your friends as reading buddies within Refind, and send them great articles with a single click. Your reading buddies will not get any kind of notification, the article you sent them will just appear within their recommendations.
If you ever have the feeling that you need to adjust your interests within Refind to get different article recommendations, you can do so anytime. Refind also sends you (an optional) newsletter with your new recommendations. Refind is without a doubt one of the loveliest apps within my tool stack. Besides Refind*, I also use Pocket to save articles to read them at a later point. My Pocket account gets synced to Reeder which is my preferred RSS reader. I can directly subscribe to RSS feeds but also sync other accounts just like Pocket with Reeder, so I can read the articles I have saved with Pocket.
Ghost*
In the past, I used a variety of newsletter services, but Ghost is the one that stuck with me. During the early days of Creativerly, I did not care about having a landing page or even a website for my newsletter. I thought there is no need for it since the content I created got sent out via email, so I was not sure what I should post or display on a landing page. As I spend increasing time in the newsletter field and publishing in general, I quickly realized that having an online presence is crucial for newsletter writers. While I was still using Mailerlite* back then (after making the switch from Mailchimp) I decided to build the first landing page for Creativerly. I used Carrd* to create the landing page in a couple of minutes. This helped me to create more awareness for Creativerly and generate more subscribers.
At some point, I found out that there are quite a lot of newsletter creators that re-purpose their newsletter issues as blog posts. I read loads of different blog posts about the importance of re-purposing your content for different channels, therefore I wanted to jump on that train. Around the same time, Substack got quite popular and I saw the chance to make the switch to it since it provided a streamlined and straightforward way to continue writing the newsletter as I used to, and at the same time could directly publish my newsletter issues as blog posts online, which made it easy to share them across different social channels, but they also generate additional traffic thanks to search engine optimization. Substack was great to grow Creativerly initially. Because of a couple of reasons, I decided to leave Substack behind and create a new home for Creativerly with Ghost, the open-source publishing software.
As of writing this, I am self-hosting Ghost* on a DigitalOcean* (using this link will get you a $200 credit over 60 days to use for your account) droplet. The reason for that is simple: Creativerly has over 2,000 members, this would mean that a Ghost (Pro) subscription (which is the service managed by Ghost) would cost me $40 per month (billed yearly) since the Creator Plan can be used for up to 3,000 members. When Creativerly continues growing as it does currently, I would need to pay $65 per month soon, which is the next tier of the Creator plan, suited for up to 5,000 members.
Although Creativerly makes some money through Affiliate Links and Sponsor Placements, I could not justify paying $480 per year for Ghost (Pro). Sure, a growing publication would probably also mean growing revenue, but since Creativerly is still a side project, I need to keep an eye on expenses. The DigitalOcean droplet I am using costs me $10 per month (but according to the Ghost docs, even the smallest droplet which costs $5 per month is suited to host and run Ghost), in addition to that, I need to pay for the emails I am sending out using Mailgun, which is the transactional-email service integrated with Ghost. With Mailgun, I am still using some sort of “Flex” Plan which is an extension of the Trial Plan. If you do not send more than 5,000 emails per month with Mailgun, the service is free-to-use. In the case you are exceeding that threshold, every 1,000 emails you send out will cost you $1.
For Creativerly, this means I am currently paying around $9 per month for Mailgun. This results in around $19 per month for self-hosting Ghost, compared to $40 per month for the Ghost (Pro) Creator Plan. I know that I will sooner than later make the switch to the managed service by Ghost (they are offering to move your self-hosted publication to any of the available plans) because then I would never have to worry about any kind of server issues that I need to handle myself. It happened a couple of times that my site was unreachable. Since my coding, hosting, server, and database knowledge is limited I had to consult a professional a few times to solve any kind of issues. In addition to that, whenever Ghost is releasing a new version, I have to manually update it. Not a big deal, but if I could get rid of it and use the time I won to focus on the more important stuff, I am considering that kind of option.
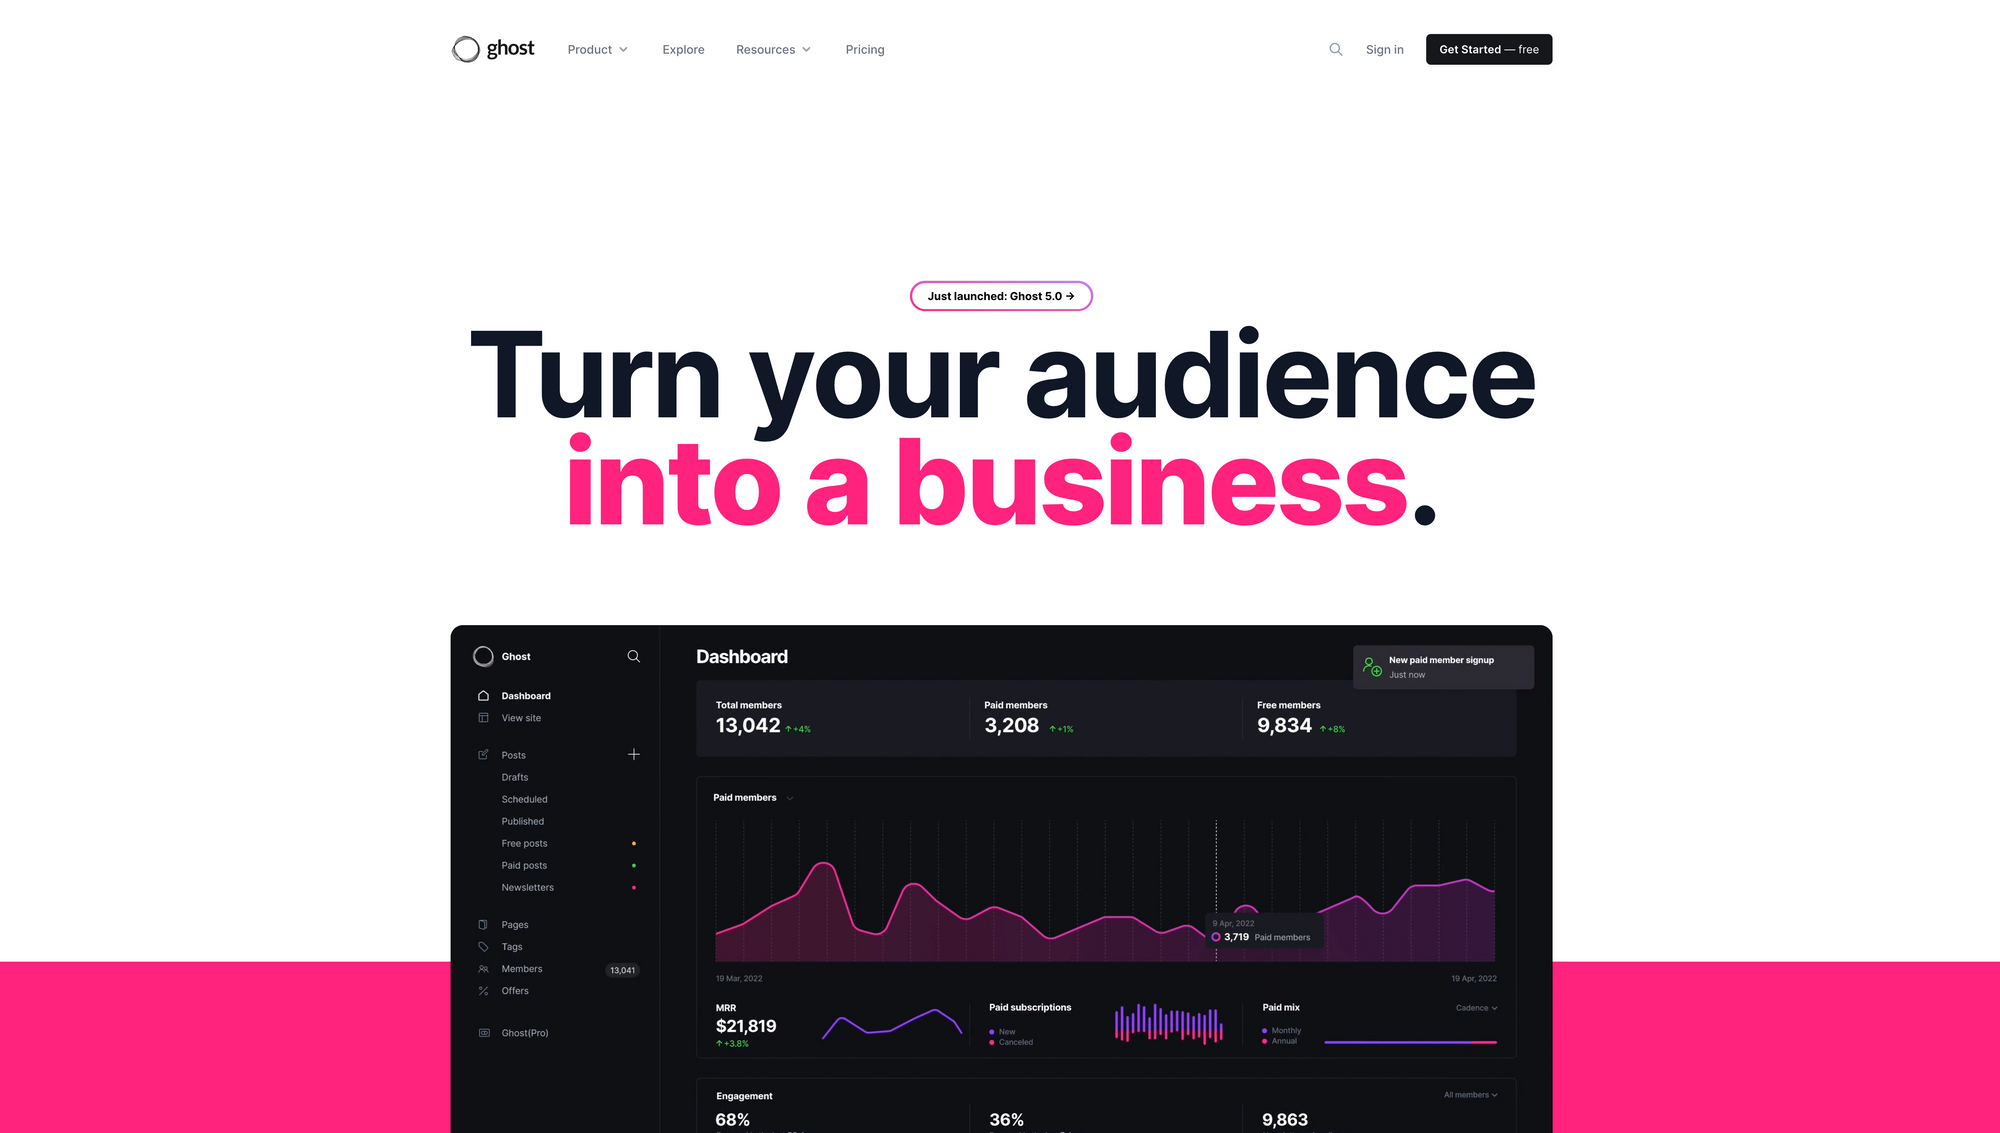
Ghost is without a doubt the best, most feature-rich, and most beautifully designed newsletter and publishing service I have used. The editor and the writing experience of Ghost are top-notch. One of my favourite features is the rich media and dynamic cards that give me the possibility to create beautiful posts. For my newsletter, I also created a couple of templates which I can easily insert into the editor by using a slash command. The newest major version of Ghost, which is version 5.0, introduced major performance upgrades, custom premium tiers, multiple newsletters, special offers, expanded analytics, more custom cards, as well as major design improvements throughout the dashboard. It is a pure joy to use Ghost regularly to create and publish content.
Fathom Analytics*
Avid Creativerly readers know that I am a privacy advocate. I always try to highlight apps and tools that have a dedicated focus on privacy, are open-source, or are end-to-end encrypted. One of Creativerly’s all-time most popular posts is a list of privacy-focused Google Analytics alternatives. In that post, you find a wide range of services to get insights into the traffic happening on your website without invading your visitors‘ privacy. Throughout the last couple of years, Google Analytics has been ruled illegal in Austria, Italy, Netherlands, and France, and it is expected that more countries will follow. The content of those rulings came down to the fact that Google Analytics violates GPDR, as US surveillance laws require US providers like Google to provide personal details to US authorities. The bottom line of this ruling is the fact that companies can not use US cloud services in Europe anymore. While there are many privacy-friendly Google Analytics alternatives available, of which some even offer the possibility to self-host the service, many websites still rely on Google and thereby forward their user data to the US multinational.
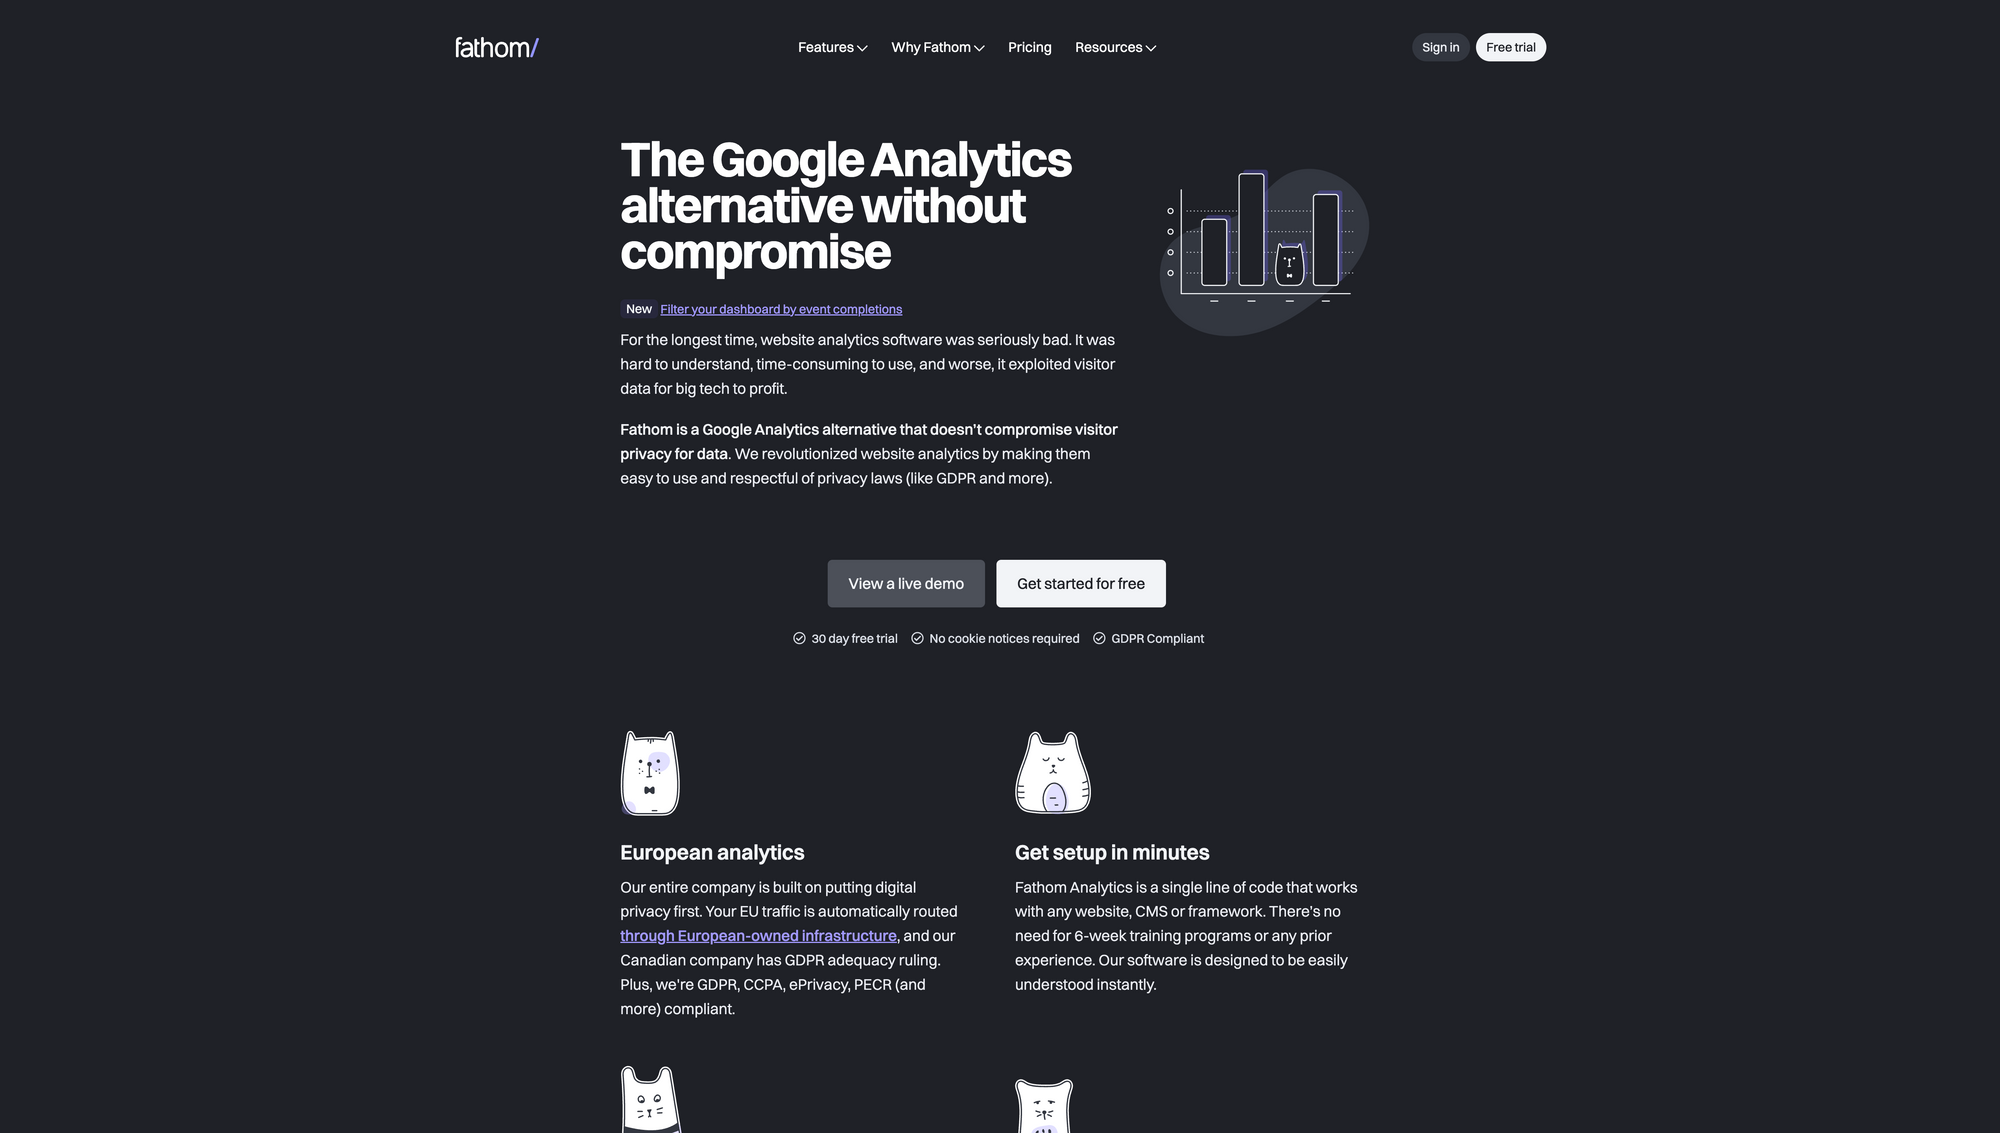
Fathom Analytics, the service I am using, is privacy-focused, GDPR, CCPA, ePrivacy, PECR (and more) compliant, and EU traffic is automatically routed through European-owned infrastructure, and Fathom’s Canadian company has GDPR adequacy ruling. This turns Fathom Analytics into one of the best privacy-friendly Google Analytics alternatives. Besides that, it features one of the most beautiful dashboards.
With Fathom Analytics you get all the website insights you need without compromising on privacy. Fathom Analytics features anonymous pageview tracking that doesn't collect or store personal data. Because of this, Fathom doesn't require annoying cookie notices. To set up Fathom Analytics on your website, all you need to do is copy and paste a single line of code. That is one thing I love about Fathom Analytics: their software was designed to be easily understood instantly, and you feel and realize that as you spend increasing time with it. With a single Fathom Analytics subscription, you can add up to 50 sites to your dashboard. The dashboard gives you a beautiful overview of the traffic happening on your websites. You can either see all of your websites at a glance or view every single website in its dashboard. With UTM parameters you can collect information about how your ad campaigns are doing, what links in your newsletter are being clicked, and more.
I do not use the full feature set of Fathom Analytics. I was on the hunt for a tool that allows me to get insights into the traffic happening on creativerly.com without spying on my visitors and protecting their privacy. While I did some research, I quickly found out that Fathom Analytics is not only of the most popular, and powerful solutions out there, but it is also beautifully designed, and I love to use beautifully designed software. The pricing structure of Fathom Analytics is super simple. All plans include up to 50 sites, 100% data ownership, uptime monitoring, no cookie banners required, unlimited email reports, forever data retention, unlimited CSV data exports, privacy law compliance, and enterprise-grade infrastructure.
The offered plans differentiate regarding the included monthly page views. For $14 per month (or $140 per year, which means you get two months for free), you get up to 100,000 monthly page views, which is suited for a wide range of websites and projects (if you use the link provided by me, you get $10 off your first invoice, and I get a small commission, which means you are supporting my work). For $24 per month (or $240 per year) you get up to 200,000 page views, and $44 per month (or $444 per year) gets you up to 500,000 monthly page views. There are even more plans that go up to 25,000,000 monthly page views. Fathom Analytics is suited for any company size.
Analytics are not a core need for Creativerly, but ultimately it is an easy way to get some insights into whether the content I am creating is getting some traffic or not. With Fathom Analytics, those insights do not happen at the cost of privacy, which is the reason I love the tool so much.
Arc
The majority of the apps I just mentioned are available as web apps. Since the browser became incredibly powerful over the last couple of years, providing incredible performance to execute tasks ranging from the fields of writing, and designing, to image editing, and even 3D modelling. Writing and curating Creativerly involves researching on the web. A couple of months ago, I received access to Arc, a browser that is reimagining and redefining the way we interact with the web. After a couple of days of usage, I knew that Arc will become my new main browser. Arc not only is a revolution within the fields of browsers because of its beautiful interface, but it also has some incredible features that boost my productivity, make switching between projects easy, and give me the creative freedom I was always looking for when I tested „modern“ browsers. But what makes Arc different to other browsers? First of all, Arc features a high standard for craft, design, and detail when it comes to the interface and user experience. There is something magical about using beautifully designed software, and Arc is the perfect example of it. It started with the onboarding experience and continued throughout the whole app.
Whenever people saw my browser, they were amazed by the number of tabs I constantly opened. I am not a tab hoarder. I just like to work across multiple tabs and keep information right at my fingertips instead of saving it within a bookmarking tool just so I forget about it. Most of nowadays browser do not let me use a workflow like that, because using a high number of open tabs or even windows to manage and structure different projects you are constantly working on, not only slows down your browser experience but your complete working machine. There are indeed browser extensions that aim to give you the chance to work across loads of tabs, but none of them clicked for me. Within Arc, I can create dedicated workspaces for different use cases and projects.
On top of that, I pinned my most used sites and organised them within folders, so I always know where my tabs were. With Shortcuts, I can navigate through my spaces and my open tabs, create new folders, set up split views, and more. Arc even lets you create nested folders, which is a huge plus when it comes to structuring and organising your work. Arc does indeed take up some space on your RAM (obviously) but it is nothing comparable to Firefox with loads of tabs open. Arc delivers a constant performance because tabs you do not pin will get archived after 24 hours so you can always be sure to work with speed and performance within your browser.
One of my favourite features of Arc is Split View. This allows me to open multiple tabs side-by-side. It has been pure joy for me to use this feature for my writing process over the last couple of days. With a recent feature, Arc reworked the Split View treating it as separate tabs, which stay open when you switch to a different tab or workspace.
Just after a couple of hours of usage, the tabs in the sidebar of Arc already felt like a no-brainer. The more time I spent with Arc, the more I realise how powerful it is, and how desperate I was in the need of a new browser experience.
Besides the tools I have mentioned above, there are a couple more tools within my tool stack, that I do not use as often and as intensively as the ones from above. Nevertheless, I still would like to take the chance to highlight them. First of all, there is Raindrop, which is a bookmarking app available for all platforms, offering a truly cross-platform experience.
I use Raindrop exactly for what it was designed for, collecting, saving, and storing bookmarks. Within Raindrop, I have set up a folder system in which I structure and organise my bookmarks. For example, I have folders to gather Product Design inspiration, products and goods, fonts, and websites in general. Whenever I do not know where to save and store a specific website or piece of content, I save it as a bookmark within Raindrop. I am revisiting my bookmarks quite frequently and go through them to see if there is anything I can quickly act on, move somewhere else, or even delete, so my archive does not get cluttered.
Folks who have been interested in sponsoring Creativerly or members who browsed through Creativerly’s database, probably realized that I am using Airtable. My general usage of Airtable is limited to those two use cases. First, I use Airtable to make the available sponsor dates for Creativerly publicly available to potential sponsors. Sure, there are other ways to do that, while there are even apps that streamline the sponsor spot booking process, but since Creativerly is operating as a registered business in Austria, the invoices I create for the sponsor spots do need to reflect some mandatory information. Therefore, I decided to keep the booking process somewhat manual, which means once a potential sponsor picked the dates from the public Airtable database, they need to get in contact with me via email and let me know the dates and what they want to advertise. After agreeing on those terms, I am setting up an invoice in Stripe and sent it to the sponsor.
As mentioned, some tools do automate that process and give interested sponsors a more streamlined booking experience, but since I do want to give potential and interested sponsors a quick check-up to see if they are a fit for Creativerly and since I am obliged to include certain kind of information on the invoices I create, I keep this process manually for now. Besides making available sponsor dates publicly available, I also use Airtable to power the Creativerly database, which is a database packed with (nearly) all the apps, tools, services, resources, and articles I have shared within Creativerly in the past. To be honest, I haven’t received an update in a while, but I still visit and add some more tools to it now and then.
Another lovely tool, that I do use way too rarely is Blocksurvey*. Blocksurvey is a tool that offers end-to-end encrypted forms and surveys. Recently, I made some changes to the format of Creativerly. Before that, I decided to conduct a quick survey to gather some insights from my audience to see how they like the current format and content of Creativerly, and also if they would like to change something. Since I have no interest in the data of my respondents, I decided to use Blocksurvey, which is a true privacy-first platform. It involves zero trackers or third-party scripts, which means I do not have to worry about my respondents' privacy. On top of that, Blocksurvey features an elegant and intuitive UI to build beautiful forms and surveys that get your readers’ attention. With over 500+ available integrations thanks to webhooks like Zapier and Integromat, Blocksurvey becomes even more powerful.
Last but not least, a big part of the work I do concerning Creativerly is writing emails, and by that, I do not mean my newsletter, but emails in general like reaching out to sponsors, communicating collaborations, answering questions from readers, and more. In the past, I used Gmail as my email service. At some point, I was done with Google and decided to ban every single Google product from my personal tool stack. This also meant searching for a Gmail alternative. I was especially on the hunt for a privacy-focused Gmail alternative, that does not spy on the folks I am sending emails to but also do not spy on myself, or store my data and sell it to third parties. After a quick research, there was one email provider that got recommended over and over again, and that provider was Proton Mail*. Proton AG is a company that was born in Switzerland in 2014 when a team of scientists who met at CERN decided to build a better internet with privacy as the default and only driving power. Fast-forward to today and Proton is offering a suite of tools and services ranging from email, and calendar, to drive, and VPN, all with a dedicated focus on privacy.
Proton Mail is a private email service. It uses open-source, end-to-end encryption and zero-access encryption to secure your email conversations. In the past, users learned to take that information with a grain of salt. Proton Mail stated in the past that they do not keep any IP logs which can be linked to an anonymous email account. Then, in 2021, Proton handed over user information after French law enforcement requested it through Europol, from Swiss authorities. Since Proton is a Switzerland-based company it is not subject to French or EU jurisdiction, but Proton is obligated to respond to Swiss authorities. This means, as soon as a crime is committed, privacy protections can be suspended and Proton is required by Swiss law to answer any kind of request from Swiss authorities.
Proton Mail users became upset, which is understandable, but ultimately the company’s compliance with the Swiss authorities is out of the company’s hands. Nevertheless, since this incident, Proton has changed some of its marketing materials.
I am a Proton Mail user, but I do have thoughts about making the switch to a different secure email provider like Skiff, Mailbox, or Posteo. The reason for that is the fact, that Proton Mail had several outages throughout the last couple of months. This happens regularly with other apps and services too, but it happened a little bit too often at Proton Mail recently, at least for my taste. Nevertheless, Proton Mail features a beautiful interface and a lovely web app, and it is available for iOS and Android as well. All in all, it is one of the best privacy-focused Gmail alternatives out there.
Other than that, you will find me using Figma for all things related to design, CleanShot* to capture and create beautiful screenshots of the apps I feature and write about within Creativerly, Raycast to blaze through all my apps and to stay on top of my Mac, and Amie to structure and organise any kind of events related to Creativerly.
If you have read this far, I am incredibly thankful. Writing this huge piece was a lot of work, but at the same time I had so much fun. We will see how many of the mentioned tools will still stick with me in two, three, four, or even five years. I am happy with my current workflows and my tool stack, since I am having so much fun writing, building, and maintaining Creativerly. If you have any questions regarding any of the mentioned tools, please do not hesitate and get in contact, my DMs are always open for my readers. In case you found this article helpful, consider supporting Creativerly and my work by buying me a coffee.

Some of the links in my newsletter and my blog posts are affiliate links. Those links are marked by an asterisk "*". If you buy something through the link, the product will not cost you anything more, but I will receive a small commission which not only supports Creativerly and my work but also helps me to keep this publication a sustainable side-project.
Discussion